Vancouver Steel Stud Framing
Techniques for Achieving Seamless Finishes in Drywall Installation
When installing drywall, it's important to aim for smooth and flawless finishes to achieve a professional and polished look. The walls' smoothness and flawlessness can greatly improve the overall appearance of any space.
Luckily, different techniques can help you become skilled at creating seamless and elegant
drywall finishes. In this guide, we will explore various proven techniques and professional tips to enable you to achieve professional-level results in your
drywall installations. These techniques will allow you to create smooth walls, leaving a lasting impression on anyone who sees them.
Essential Tips for Achieving a Professional-Quality Drywall Finish
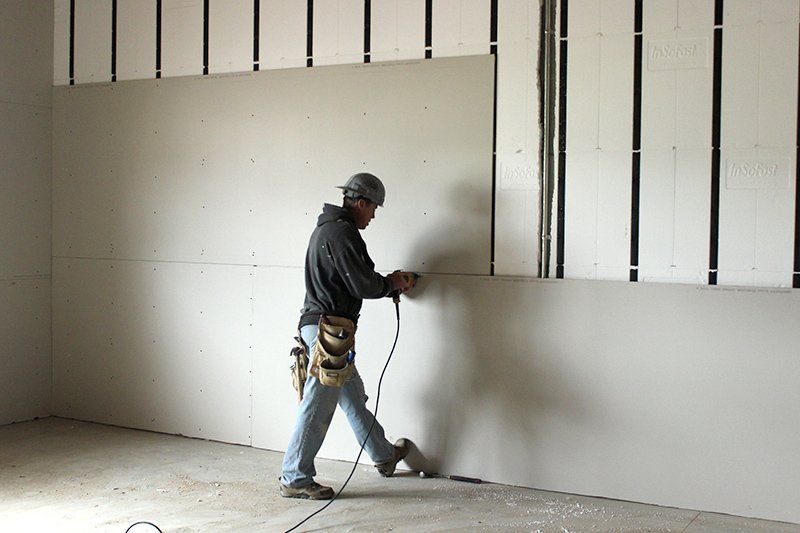
Prepare the Surface
Before starting, ensure the wallboard is securely attached to the wooden studs, joists, and other structural members by nailing or screwing it. Pay special attention to supporting the edges.
All nail or screw heads should be properly countersunk below the surface of the wallboard. Patch any large holes or openings before beginning the finishing process. Remember that joint compound is not designed to fill extensive gaps or holes, only seams and nail indentations.
Apply tape to all the seams, including both flat walls and corners. Although I advise using self-adhesive fibreglass mesh tape, some experts still favour paper tape.
Narrow Knives First for Smooth Wallboard Joints
In the process of finishing wallboard joints, the sequence is crucial. Use a narrow knife, around four inches wide, to apply the first coat. Centre the blade on the joint and cover the taped seam with the joint compound.
Remember, the purpose of the first coat is not for appearance but for structural support. Focus on filling the gaps rather than achieving a perfectly smooth surface. Make sure there are no high spots protruding from the wallboard.
For the second coat, use a thinner and broader band of joint compound applied with a wider knife, approximately six inches across. Again, centre the blade on the seam, but this time, pay more attention to achieving a smoother surface. This will make subsequent passes and sanding easier.
The third coat is essential. Apply it with a wide taping knife, about ten inches wide, in a thin layer. The third coat should suffice if the first two coats were evenly and carefully applied. Sometimes, a touch-up with a fourth coat may save time during sanding.
Some professionals can effortlessly trowel their joints to perfection when sanding the wall smoothly. However, sanding is necessary for most people to remove bumps, beads, and trowel marks.
Use drywall sandpaper, which has an open weave that resists clogging. Alternatively, you can opt for sanding devices designed for drywall work. These tools have a flat, trowel-like bottom with handles, similar to sanding blocks. Swivel attachments and broom-handle extensions are also available for sanding hard-to-reach areas like ceilings.
Pay special attention when sanding the compound's edge, where the paper surface is exposed. Avoid excessive sanding in this area to prevent abrasion and tearing of the paper.
Remember to wear a mask when sanding drywall to protect yourself from inhaling the powdery residue. While drywall dust is not toxic, it's wise to take precautions.
Wet sandpaper and sponge sanders can be used for drywall work if desired. Wet sanding helps reduce the amount of fine dust that becomes airborne.
Explore Additional Tools for Applying Joint Compound
In addition to traditional methods, various new tools are available for applying joint compounds. One such tool is called a bazooka, which has a reservoir of a compound that directly feeds into the taped joints.
Another handy tool is the banjo, designed specifically for applying tape, saving time, especially for professionals. While these machines may not be practical for a single-room project, investing in more advanced equipment could be worth considering if you're undertaking taping work for an entire house.
Avoiding Common Mistakes for a Flawless Finish
Avoid these common mistakes when finishing drywall to achieve a professional-quality result:
Using Too Much Joint Compound
Applying excessive joint compounds can prolong drying time and require more sanding. To avoid this, apply thin and even layers of joint compound.
Over-Sanding
Excessive sanding can damage the tape and create uneven patches on the surface. Instead, sand lightly, focusing on smoothing the joint compound without digging into the tape.
Neglecting to Feather the Edges
Properly feathering the edges of the joint compound ensures a seamless transition between the compound and the surrounding drywall. Without feathering, visible lines or ridges may appear after painting. Gradually use larger drywall knives to achieve a smooth and feathered edge.
Insufficient Drying Time
To achieve a smooth finish, allow sufficient drying time between layers of joint compound. Rushing the process can result in cracks, bubbles, and peeling tape. Follow the recommended drying times provided by the manufacturer and consider using a dehumidifier in humid environments to speed up drying.
Final Tips for Achieving a Perfect Drywall Finish
To ensure a flawless finish when working with drywall joints, consider the following additional suggestions:
Keep your Tools Clean
Regularly clean your drywall knives and a mud pan. This prevents dried joint compounds from ruining the smoothness of your work. Clean tools perform better and give you a professional finish.
You can prioritize cleaning the following tools:
Drywall Knives
Use a moist cloth or sponge to clean your drywall knives as you work. This removes extra joint compounds that can stick to the blades. Clean knives help you apply the compound more accurately.
Mud Pan
When you finish a layer or task, take a moment to clean your mud pan thoroughly. Use warm water, a scrub brush, or a sponge to remove any dried or excess compound. Starting with a clean pan each time avoids contamination and keeps your results consistent.
The Dried Compound from the Knife's Edge
Over time, the joint compound can dry and harden on the edge of your drywall knife. This can make the surface uneven and affect later coats. Use a knife or similar tool to scrape off any dried compound. Keeping the knife edge clean and smooth helps you apply the compound more smoothly.
Use the Right Tape for the Job
Choose paper tape for most joints, and use mesh tape when working on repairs or challenging surfaces. Consider these simple guidelines:
Use Paper Tape for Most Joints
For the majority of joints, go with paper tape. It sticks well and lasts long, making it perfect for regular drywall work. When using paper tape, embed it properly in the joint compound for a strong and secure hold.
Choose Mesh Tape for Repairs or Tricky Surfaces
Opt for mesh tape when dealing with repairs or surfaces that are challenging. It's flexible and can easily adapt to uneven areas and curves. The greatest part is that the mesh tape has a self-adhesive backing for easy application. Use mesh tape in corners, gaps, or uneven surfaces where paper tape might work less effectively.
Ensure Proper Lighting
Good lighting is essential for spotting imperfections during the finishing process.
Make sure you have a light that is bright enough and can be pointed directly at the area you're working on. This will illuminate the surface and make any flaws easier to spot. A focused beam of light helps you see uneven spots or ridges that need fixing.
Also, take breaks to inspect your work under the bright light. This lets you catch any imperfections early on and make the necessary adjustments. You'll have a smoother and more professional-looking finish by dealing with issues promptly.
Practice Patience
Finishing drywall joints is a skill that takes time to master. It takes time to learn the techniques and improve your craftsmanship. Be patient with yourself and embrace the learning process. Give yourself a chance to try different techniques, learn from mistakes, and refine your skills.
You will develop the necessary skills to achieve outstanding drywall finishes by practising patience throughout the learning process. Remember, patience is the key to mastering this craft.
Conclusion
When completing drywall joints, you will be on the right track to produce results of a professional calibre if you adhere to the instructions and advice included in this comprehensive guide. It's important to remember that patience and practice are keys to becoming skilled in this technique, so don't feel disheartened if your initial tries aren't flawless. With dedication and time, you will become skilled in drywall joint finishing for your home improvement endeavours.
Looking for professional
drywall installation services in Canada? Look no further than Vancouver Drywall & Steel Stud Framing! Whether it's a residential or commercial project, our skilled professionals ensure precise and efficient installation, delivering exceptional results every time. Contact us today for a flawless drywall installation experience!
FAQs
Share this:
Address
4214 Miller St. Vancouver, BC, V5N 3Z8 Canada
Phone
604-200-4708
vansteelstuds@gmail.com