Vancouver Steel Stud Framing
Screwing for Drywalls:
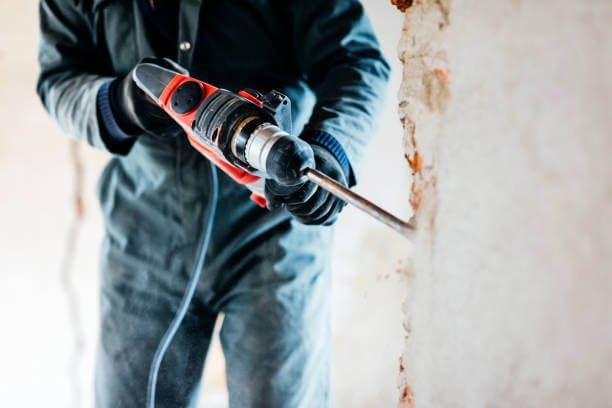
Best Practices for Screw Placement
The importance of precise screw placement cannot be emphasized enough in drywall installation. Whether working with metal studs or acoustic ceilings, the strategic positioning of screws is important for ensuring the durability, longevity, and overall quality of these installations.
Optimizing the distribution of weight is achievable through strategic screw placement at suitable intervals and depths. This technique disperses the load across the surface, significantly reducing the chances of sagging or bulging. As a result, the integrity of the installation is preserved for an extended period.

The Importance of Proper Screw Placement in Drywall Installation
Structural integrity
Properly placed screws provide the necessary support to firmly hold the drywall. They help distribute the weight evenly across the surface, preventing sagging or shifting of the panels over time.
Preventing cracks and damage
Incorrect screw placement can lead to cracks in the drywall, compromising its integrity and aesthetics. Following the recommended guidelines can minimize the risk of cracks and ensure a smooth and durable finish.
Stability and longevity
Secure screw placement enhances the overall stability and longevity of the drywall. It helps maintain the integrity of the installation, preventing issues such as loose panels, wavy surfaces, or protruding screws that could pose safety hazards or require costly repairs in the future.
Professional-grade finish
Proper screw placement ensures a professional-grade finish with a seamless appearance. By following best practices, you can achieve a smooth, even surface ready for painting, wallpapering, or other finishing touches.
Time and cost savings
Knowing the correct screw placement saves time and reduces the likelihood of rework or repairs. You can complete the installation efficiently and minimize the need for additional materials or labour by avoiding mistakes or improper placement.
The Different Kinds Of Screws Used For Drywall Installation
Coarse-thread drywall screws
These screws feature coarse threads that provide strong holding power in drywall and ceiling materials. They commonly attach acoustic ceiling panels to framing or furring channels.
Fine-thread drywall screws
Fine-thread drywall screws have closer threads, offering increased holding power in harder materials like metal studs or resilient channels. They are suitable for acoustic ceilings installed on metal framing.
Self-drilling screws
Self-drilling screws have a drill-like point, allowing them to penetrate and secure the acoustic ceiling panels directly into metal studs or channels without pre-drilling. They are convenient for quick and efficient installations.
Bugle head screws
Bugle head screws have a flat top with a concave shape. They are commonly used in acoustic ceiling installations, providing a flush or slightly recessed finish when driven into the panels. This helps create a smooth and even ceiling surface.
Pan head screws
Pan head screws have a rounded top and are often used when a more decorative or exposed fastening is desired. While less common in acoustic ceiling installations, they can suit certain designs or architectural preferences.
Best Practices for Successful and Secure Metal Stud Installation
When it comes to metal stud installation, following best practices is essential for achieving successful and secure results. Below are valuable tips to ensure proper installation and maximize the stability and durability of your metal stud walls.
Use self-drilling screws
Self-drilling screws are specifically designed for metal applications and have a drill bit tip that eliminates the need for pre-drilling pilot holes. These screws make the installation process faster and more efficient.
Select the appropriate screw size and type
Choose screws suitable for metal studs, such as fine-threaded or coarse-threaded screws. The size of the screw should match the thickness of the drywall and the gauge of the metal stud.
Use a screw gun or drill with adjustable torque settings
Metal studs require controlled torque to avoid overdriving or stripping the screws. Adjust the torque settings on your screw gun or drill to ensure consistent and proper installation.
Determine the screw spacing
Follow the manufacturer's recommendations for screw spacing, typically around 12 to 16 inches apart along the stud. This spacing provides adequate support and prevents the drywall from sagging or bulging.
Avoid over-tightening
Metal studs can be sensitive to overtightening, which can cause deformation or damage. Apply enough pressure to secure the drywall but avoid overdriving the screws.
Ensure flush screw placement
Drive the screws flush with the surface of the drywall without breaking through or sinking too deep. This creates a level and smooth finish for further wall treatments.
Use caution near edges and corners
Pay extra attention when screwing near edges and corners to prevent the metal studs from bending or twisting. Place screws at least 3/8 inch away from the edge to maintain stud integrity.
Inspect for secure attachment
Inspect the installation after screwing the drywall to the metal studs to ensure a secure attachment. Check for any loose screws or areas that may require additional fastening and to strengthen the lock towards your knot.
The Best Practice Process For Acoustic Ceilings
Acoustic ceilings provide a range of benefits that contribute to a comfortable and functional environment. One of the primary advantages is improved sound control, as they absorb and reduce noise levels, creating a quieter space and enhancing speech clarity. Acoustic ceilings create better acoustics for various settings, such as offices, classrooms, theaters, and restaurants.
Planning and Design
Take the time to carefully plan and design your acoustic ceiling project. Consider factors such as the desired acoustic performance, aesthetic appeal, and compatibility with existing structures.
Material Selection
Choose high-quality acoustic ceiling materials that meet your specific requirements. Consider factors such as sound absorption, durability, ease of installation, and maintenance.
Proper Installation
Follow manufacturer guidelines and installation instructions meticulously. Ensure the ceiling framework is properly prepared and structurally sound before installing the acoustic panels.
Soundproofing and Insulation
Consider incorporating additional soundproofing and insulation materials to further enhance the acoustic performance of the ceiling. This can help reduce sound transmission between rooms and improve overall comfort.
Screw Placement
Pay careful attention to screw placement when attaching acoustic panels to the ceiling framework. Follow recommended spacing guidelines, avoid placing screws too close to panel edges, and use the appropriate screw length for secure and stable installation.
Seamless Joints
Take care to achieve seamless joints between acoustic panels. Use the appropriate jointing techniques, such as butt joints or tongue and groove systems, and ensure a smooth transition between panels for a visually appealing finish.
Lighting and Fixtures
Plan for the integration of lighting fixtures and other ceiling-mounted elements. Coordinate the installation of electrical wiring and fixtures with the acoustic ceiling installation to ensure proper alignment and functionality.
Maintenance and Cleaning
Regularly maintain and clean your acoustic ceiling to preserve its performance and appearance. Follow recommended cleaning methods and avoid using toxic chemicals or materials that could damage the acoustic panels.
The Benefits of of Screws In Acoustic Ceiling Installations:
Achieving optimal acoustic performance and aesthetic appeal in your space requires following the best practice process for acoustic ceilings. Below are the key steps to consider when planning, designing, and installing an acoustic ceiling.
Secure attachment
Screws provide a strong and secure attachment for acoustic ceiling panels. They hold the panels firmly, preventing sagging or shifting over time.
Easy installation Process
Screws are relatively easy to install, especially when using power tools such as screw guns or drills. This makes the installation process efficient and allows for precise screw placement.
Adjustable positioning
Unlike adhesives or other fastening methods, screws allow for adjusting and repositioning acoustic ceiling panels during installation. This flexibility ensures accurate alignment and a visually pleasing result.
Accessibility for maintenance
Acoustic ceilings may require occasional access for maintenance or repairs. Using screws allows for easy removal and reinstallation of panels when needed, providing convenient access to the ceiling cavity.
Durable and long-lasting
Screwed acoustic ceilings have excellent durability and longevity. The secure attachment provided by screws helps to maintain the integrity of the ceiling over time, ensuring it remains in place and retains its acoustic properties.
Minimal damage to panels
Properly installed screws minimize the risk of damage to acoustic ceiling panels. When compared to other fastening methods that may require adhesives or staples, screws offer a more reliable and less invasive solution.
Enhanced aesthetics
Screwed acoustic ceilings provide a clean and smooth finished appearance. The screws can be countersunk or concealed with paintable caps to create a seamless and visually appealing ceiling surface area.
Conclusion
Proper screw placement minimizes the likelihood of unsightly cracks or gaps between the panels. When screws are positioned accurately, they help hold the panels tightly together, creating a seamless and professional appearance. This attention to detail results in a visually appealing finish that enhances the overall aesthetics of the space.
Beyond aesthetics, precise screw placement ensures the stability and durability of the drywall installation. Securing the panels firmly to the underlying framework helps maintain the structural integrity of the walls or ceilings, providing a solid and reliable surface.
Vancouver Drywall and Steel Stud Framing specializes in delivering exceptional drywall and steel stud framing services in the Vancouver area. Our team of skilled professionals is committed to ensuring quality and achieving superior results that enhance stability and durability in every drywall installation.
Share this:

Address
4214 Miller St. Vancouver, BC, V5N 3Z8 Canada
Phone
604-200-4708
vansteelstuds@gmail.com