Vancouver Steel Stud Framing
Steel Stud Installers Top Techniques for Cutting, Fastening, and Layout
Every steel stud can be sturdy, reliable, and strong. However, this promising result won’t be attained without following proper methods.
Cutting, fastening, and installation accuracy are the three fundamentals of the steel stud installation industry. Each part of a sturdy construction ensures that every wall stands straight, every ceiling supports, and every corner lasts.
Although understanding these procedures is beneficial, experienced steel stud installers are needed. Enlisting professional steel stud framing services may improve the quality of your entire building project.
Enlisting professional steel stud framing services improves the quality of your entire building project. Reach out to steel stud installers to maximize your steel stud project today.
Cutting Steel Studs
Cutting studs takes precision tools and ability. The tools below are crucial when reducing studs for a seamless fit or creating complicated curves.
Precision Cutting Tools
1. Aviation Snips
- Straight-Cut Snips: These snips work well for precise stud trimming due to their linear blades. The straight-bladed design cuts studs cleanly and accurately.
- Left-Cut Snips: Left-angled blades simplify left curves and complicated shapes. Precision and control make these snips ideal for tight corners and bends.
- Right-Cut Snips: Right-cut snips have right-angled blades like left-cutters. They enable smooth right curves and versatile cutting routes.
2. Power Shears
Power shears are effective and fast cutters. These electric tools slice steel studs quickly and accurately:
- Rapid Cutting: With their speed and precision, power shears make detailed trimming much faster.
- Clean Edges: Power shear blades leave clean, straight edges, reducing the filing and finishing of the building material.
However, power shears require strict safety and handling precautions:
- Protective Measures: Use gloves and eye protection when using power shears. Mishandling the sharp blades might cause damage.
- Secure Clamping: Clamp the steel stud before using the power shears. This reduces cutting motion.
- Stable Stance: Maintain a steady stance and tool grip to regulate the cutting course. Avoid touching sharp blades by keeping your fingers away from the cutting region.
3. Chop Saws with Carbide-Tipped Blades
A chop saw frame and sharp carbide-tipped blade provide precise cuts with little effort. Precision is essential for tight joints, flawless t-bar ceilings, and drywall installation. Consider the following when choosing a chop saw carbide-tipped blade:
- Tooth Configuration: Alternate top bevel (ATB) blades cut metal studs cleanly. These teeth soften edges and reduce splintering.
- Tooth Count: Choose a blade with more teeth for finer cutting. More teeth per inch (TPI) means smoother cuts with less material loss.
- Blade size: Blade size should match chop saw specs. An inappropriate blade size can reduce cutting efficiency and pose safety risks.
Minimizing Burrs and Sharp Edges
Steel stud installation requires precision cuts and edge refining for safety and a clean finish. Deburring and sanding/grinding are needed to reduce burrs and sharp edges.
Importance of Burr Removal
After metal studs are cut, the presence of burrs poses safety risks and detracts from the installation's appearance. If left untreated, these burrs can cause injury to installers and residents and may also lead to damage to nearby objects.
Deburring Tools: Effective Use
- Handheld Deburring Knife: Remove burrs by gently scraping the steel stud edge with the knife at an angle. Use smooth, consistent motions to polish an edge.
- Power-Assisted Deburring Machine: A power-assisted machine is efficient when deburring more studs or thicker materials. The spinning deburring wheel removes burrs precisely as you drive the machine along the steel stud.
Expert Tip: Always deburr both sides of the cut for a safe, uniform edge. Avoid removing extra material, which will weaken the stud.
Sanding or Grinding Techniques
Steel stud edges may be harsh after deburring. Finishing with sanding or grinding smooth edges for safety and professional results.
- Sandpaper Grits: Start hand-sanding with 80 or 100 grit to remove burrs and rough edges. Gradually move to 120, 180, and 240 grits for a smoother finish.
- Grinding Tools: Start with a medium-grit disc to remove major defects, then polish with a finer one. Hold the grinder at a steady angle for consistent results.
Fastening Methods
Fasteners are invisible threads that keep studs together, ensuring the structural stability and lifespan of steel frames.
Self-Drilling Screws for Steel Framing
Self-drilling screws have transformed steel framing fastening, bringing many benefits:
- Time-Saving: These screws save installation time without pre-drilling pilot holes.
- Efficiency: The built-in drill bit tips of self-drilling screws make it easy for a drywall contractor to secure and penetrate metal studs.
- Splitting Risk Reduced: Self-drilling screws have less chance of fracturing studs.
Securing Steel Studs Effectively
| Factor | Consideration | Instruction |
|---|---|---|
| Proper Screw Size and Spacing | Gauge Matching | Use #8 screws for 25-gauge steel studs, #10 for 20-gauge studs |
| Length Consideration | Screw length should penetrate materials securely. | |
| Edge Distance | Maintain a 3/4" to 1" distance from the edge of the stud to prevent material failure. | |
| On-Center Spacing | Follow building codes, typically 12" in the center for walls and 16" for ceilings. | |
| Driving Techniques | Drill Speed | Use low speed on variable-speed drills to avoid overheating. |
| Straight Angle | Keep the drill perpendicular to the stud surface for straight driving. | |
| Avoid Over-Tightening | Set torque appropriately to prevent damage and stripping. | |
| Stopping Point | Stop when the screw is snug and flush with the surface to avoid stripping or material deformation. |
Tools for Efficient Fastening
Installers can improve efficiency in construction services by using pneumatic or cordless screw guns for speed and depth control.
Pneumatic Screwguns
- Compressed air-powered pneumatic screw guns are known for their speed and reliability.
- Pneumatic power drives screws quickly, saving installation time.
- These guns' changeable depth settings allow installers to specify screw depths precisely.
- Air compressors power pneumatic screw guns; thus, they don't need batteries or recharging.
Pressure Adjustments: Proper air pressure adjustment is essential for maximum performance. Drive quicker with more pressure, but screws may sink too deeply or strip threads.
Adjustable Depth: Most pneumatic screw guns offer depth adjustments. Make sure the screw is flush with the material without overdriving by setting the depth.
Cordless Screw Guns
Cordless screw guns offer unrivalled mobility on the construction site, especially in tight or hard-to-reach locations. They are lightweight and ergonomic, decreasing user fatigue.
Battery Life and Charging Advice
- Assess battery life based on project needs. Higher capacity batteries (measured in ampere-hours, or Ah) offer longer runtime.
- Consider having extra batteries to avoid interruptions.
- Adjust speed settings per task to save battery life. Lower speeds save battery life.
Installation Accuracy
Precise Layout Techniques
Marking Stud Locations on Floors and Ceilings
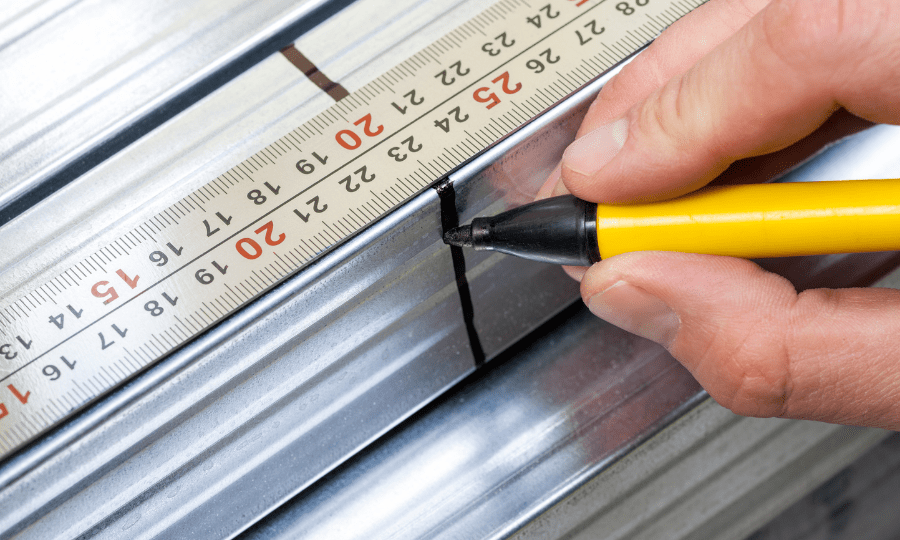
- Chalk Lines: Stretch taut between points, snap for a visible line, and use as a guide for stud placement for steel and wood framing.
- Pencils: Create minor, precise marks with a pencil on the floor/ceiling corresponding to the layout plan.
- Considerations:
- Spacing: 16 inches in the center for ceilings, 24 inches for walls.
- Layout Plans: Refer to blueprints for accuracy, and double-check measurements.
Plumb Bobs for Vertical Alignment
Attach the top of the stud, allow it to hang freely, and ensure the string aligns with a marked location for verticality.
- Steady Positioning: Hold steady, and avoid swaying for accurate measurements.
- Multiple Points: Use multiple plumb bobs for long walls or complex layouts.
Laser Levels for Leveling
- Quick, accurate layout with straight, level line projection.
- Use for horizontal, vertical, and sloped levelling.
- Ensures uniformity in stud height and placement for balanced construction.
Tips for Setting Up and Using Laser Levels on Steel Studs
- Secure Mounting: Stable tripod or mount for proper height.
- Adjusting Height: Align to the desired height until the laser line matches the layout plan.
- Marking Guidelines: Use laser line as a reference for precise stud location marks on floors and ceilings.
Securing Studs in Place
Concrete Anchors
Wedge anchors or sleeve anchors. Provide secure attachment to concrete surfaces.
Fastening Techniques:
Pre-Drilling: Drill steel stud holes before anchoring to avoid splitting or damage.
Proper Anchor Size: Anchor size should match the pre-drilled hole diameter and material.
Joist Hangers
Metal brackets attached to steel studs and joists for sturdy connection in ceilings or suspended structures.
Torque Settings: Power tool torque should match manufacturer standards for proper fastening.

Secure Structure with Steel Stud Framing Vancouver
Accurate cutting, careful arrangement, and solid fastening are essential to the structure's stability. Every stage of the construction process, from cutting to anchoring, affects structural integrity and durability.
Professional installers are knowledgeable and efficient, ensuring a job is done well the first time. Experienced specialists at Vancouver Steel Stud Framing Ltd. have the resources, techniques, and insights to help you.
Frequently Asked Questions
-
Are steel studs better than wood frames?
Many recommend steel stud framing for residential and commercial properties because of its many benefits. Metal studs are stronger than wood and last longer.
Another important consideration for modern structures is energy efficiency, which improves steel stud framing. The ease of installation and resistance to warping and shrinking make metal studs popular among ceiling contractors and homeowners.
-
Can my mitre saw cut steel studs with a wood blade?
Do not cut steel studs with a mitre saw wood blade. Although wood and steel studs look similar, using a wood blade to cut steel is unsafe and ineffective.
-
Does using a laser level for framing come with any safety concerns?
Yes, using a laser level for framing or other construction tasks requires various safety precautions.
- Protect yourself from laser beams with safety eyewear. Never stare at the laser.
- Be sure to use a laser detector in well-lit areas.:
- Keep the laser away from mirrors, glass, and glossy surfaces to avoid reflections.
- Use recommended batteries and chargers. Dry and disconnect the laser when not used.

Address
4214 Miller St. Vancouver, BC, V5N 3Z8 Canada
Phone
604-200-4708
vansteelstuds@gmail.com
CONTACT US TODAY!
Contact Us
We will get back to you as soon as possible
Please try again later
